
Prerequisites:
In order to use the User-Journey API inside your Bubble Application, you'll need to first install the API-Connector plugin, if you haven't already.
After that, go to your account settings in User-Journey and get an auth-token. Be sure to copy exactly the auth-token (nothing more and nothing less). You can also keep the page with the auth-token displayed open for a few more minutes, you'll need it soon.
1. Adding the User-Journey API
After you’ve got your Auth-Token, we’ll add the User-Journey API to your Bubble application. Head to Plugins → API-Connector → Add another API.
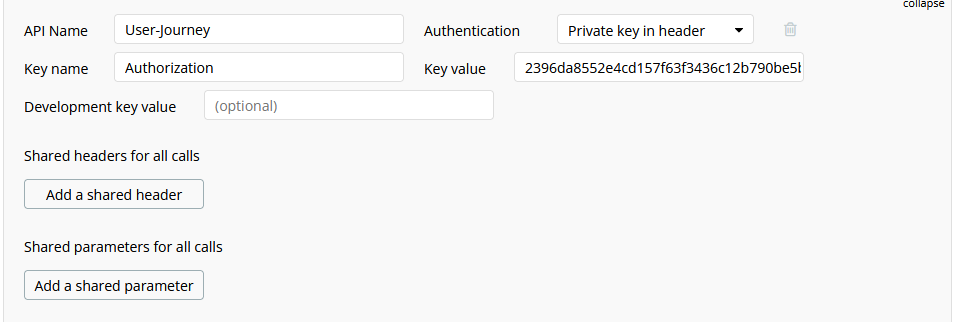
In the form, you’ll need to enter a name for the API (for example User-Journey) and select Private key in header as the method of authentication. The key name should already default to Authorization. If not, change it to Authorization.
You'll then be able to copy the auth-token you created earlier into the key value field. Be sure that nothing except the auth-token has been copied and that the whole token has been copied. The form should look similar to this:
2. Adding the "Post Event" API call
Next, you'll create the specific API call that will send an event / lifecycle-journey-goal to user-journey.
Expand the first API call (create one if none is existing) and fill these fields:
- Name: Post Event (can be anything else you want, really)
- Use as: Action (because we want to change state, not fetch data)
- Method: Post
- Url:
https://user-journey.cc/api/trigger-event?user-email=[user-email]&event-key=[event-key]
This will add two parameters to your API call. Make sure that they are not private (so we can set them in the workflow dynamically).
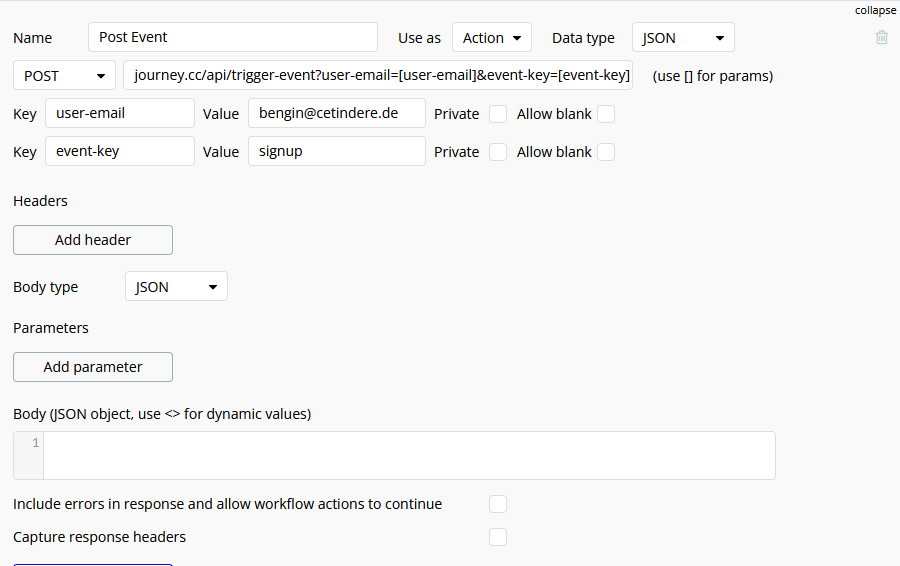
In order to initialize the API call (only needed once), put in your own email address and type signup into the event-key field.
This is what it should look like:
After that, you'll be ready to hit the "initialize call" button at the bottom. You should get the below popup confirming that the call was successful. If anything didn't work and you can't figure out why, don't hesitate to use the live chat widget on the bottom right to ask for help.
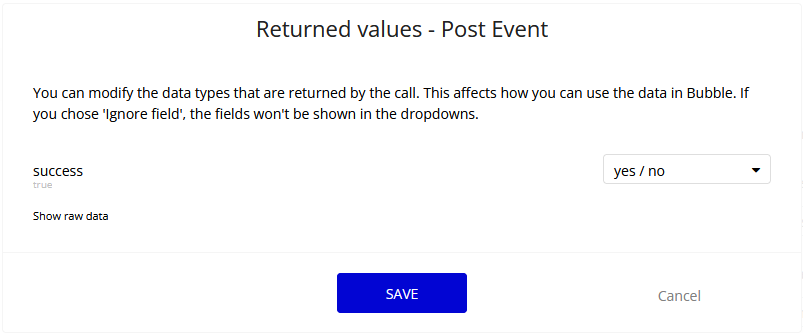
The return value of the API call is not really important. If you want to do stuff based on if the call was successful, you can use it later in the workflow, but it's not mandatory.
3. Adding the API Call to Your Workflows
Add the newly created API call to your workflows, starting with the signup workflow. You can add a new action right after the "Sign the user up" action.
Select the new API Call under Plugins → User-Journey - Post Event:
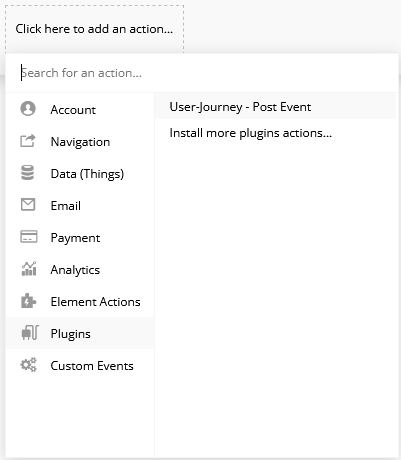
You should then see two fields, user-email and event-key:
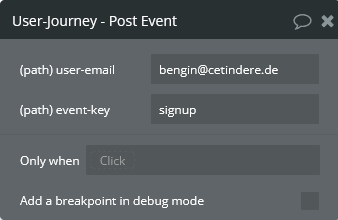
If that's not the case for you, go back to the API Call you added inside API-Connector and make sure that both fields are not set to private. This will allow you to set them inside the Workflow dynamically.
Next, click on the user-email field and select Insert Dynamic data. If you didn't change the default signup in Bubble, you can then select "Input Sign Up Email" to pass the email that the user is signing up with.
For the event-key, enter signup.
This is it. Now simply repeat adding the API call to other workflows that resemble a lifecycle goal. You'll find all lifecycle goals of a given sequence inside your api-docs.
Instead of signup, you'll then want to enter the appropriate event-key to the action. Make sure to also pass in Current User's email to the email field.
Recommended: Saving Custom Metadata
Apart from the event-key and user-email, you can send custom metadata that User-Journey saves for this user, so you can reference it in email later. One of the most popular examples is the first name.
The metadata is sent in the URL too, just next to the event-key and user-email. An example signup API call that saves the first-name looks like this:
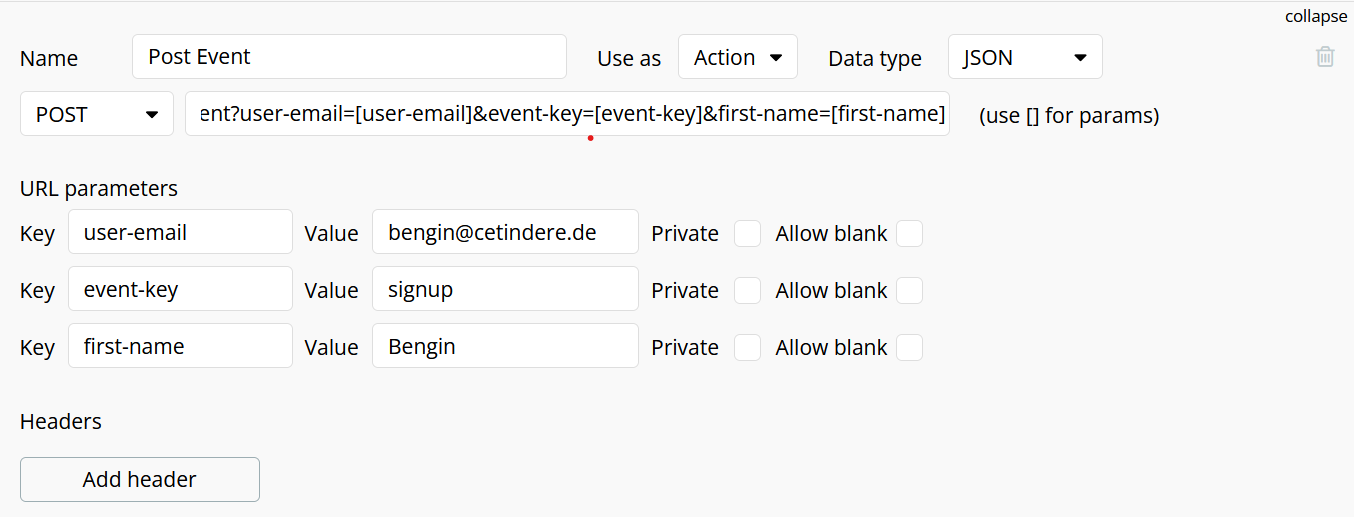
As you can see, we just add one more URL query parameter. The precise key of that attribute is not important - instead of first-name=[first-name] you could also use name=[user-name]. In that case, you'd use Hello {{name}} inside your emails instead of Hello {{first-name}}.
If you don't want to create a separate API call for each possible metadata in the API-Connector plugin, you can abstract like this inside Bubble:
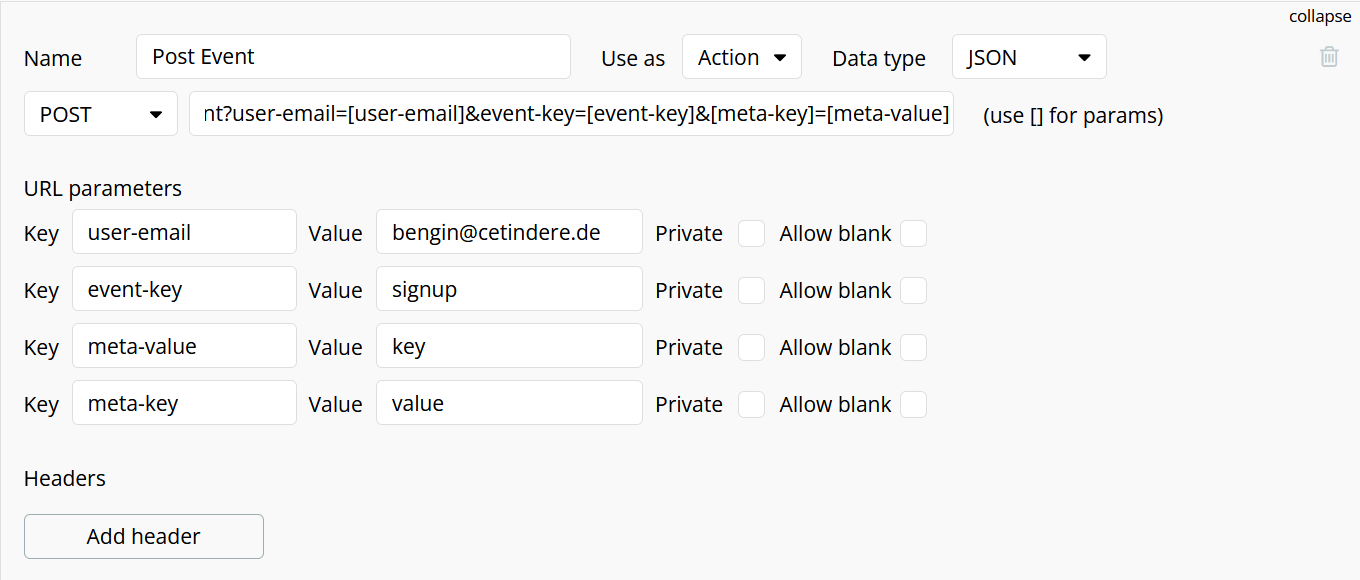
In this example, the key of the URL query parameter is a variable itself. This way you can select a meta-key dynamically in the workflow.
That's it, now you are ready to send 100% relevant lifecycle emails with User-Journey. If you need help on the content-side, read this article about how to implement the lifecycle emails in less than an hour.
For any questions you might have, just shoot a message in the livechat inside User-Journey, I'll be glad to help you.